Tag: first

  • Where Should I Get My First Small Tattoo?

    Where Should I Get My First Small Tattoo?

    Where Should I Get My First Small Tattoo?

    Where Should I Get My First Small Tattoo? A Guide to Finding the Perfect Spot

    So, you’re ready to take the plunge and get your first tattoo! Congratulations! It’s an exciting step, and the possibilities seem endless. But before you get swept away by intricate designs and vibrant colors, let’s tackle the fundamental question: where should you actually put this little piece of art?

    Choosing the location for your first tattoo is just as important as choosing the design itself. It’s a decision that considers pain tolerance, visibility, lifestyle, and ultimately, what resonates with you. This guide is here to help you navigate the landscape of potential tattoo spots, weighing the pros and cons of each to ensure you find the perfect canvas for your first ink.

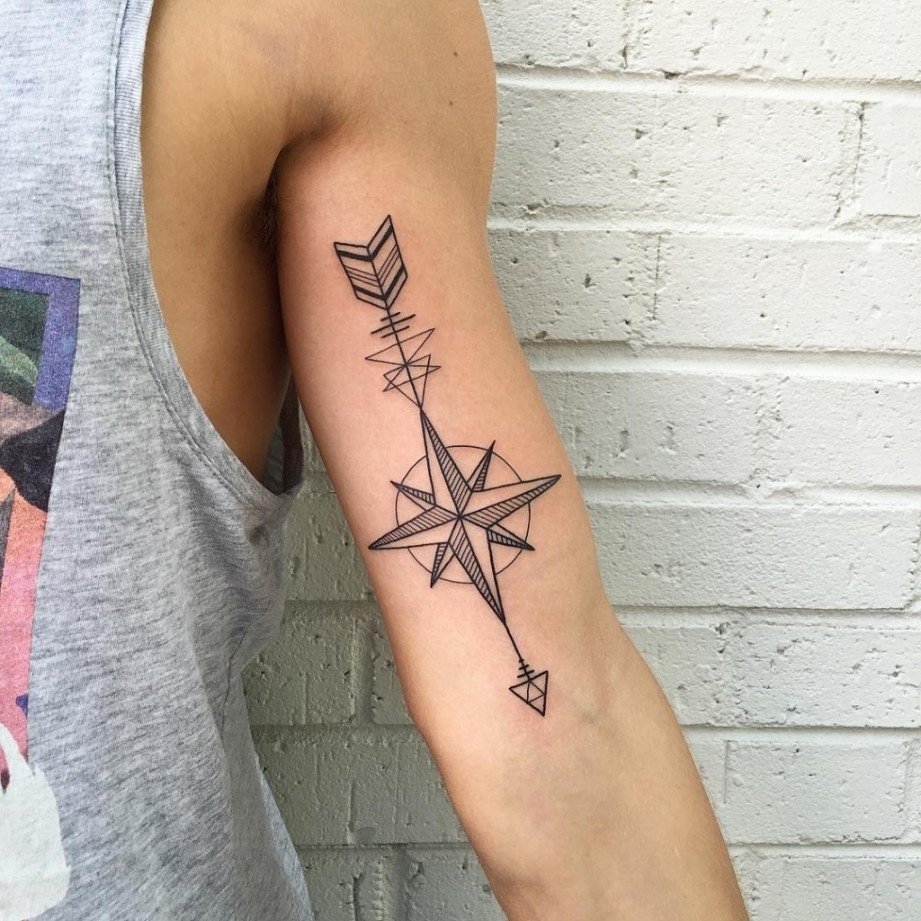
    1. Embracing the Inner Arm: A Classic Choice

    The inner arm, specifically the bicep area, is a popular choice for first-timers, and for good reason.

    • Pain Factor: Relatively low, especially compared to bonier areas. The muscle provides a nice cushion.
    • Visibility: Easily concealable with sleeves, or easily shown off in a t-shirt. You have control.
    • Pros: A good balance of visibility and discretion. Offers a decent amount of space for small to medium-sized designs. The skin here tends to hold ink well.
    • Cons: Can be slightly sensitive, especially closer to the armpit. Movement can sometimes distort the design slightly.

    2. The Wrist: A Delicate Statement

    The wrist is a more visible location, often chosen for delicate and meaningful designs.

    • Pain Factor: Moderate. The skin is thinner and closer to the bone.
    • Visibility: High. It’s almost always visible, unless you’re wearing long sleeves.
    • Pros: A great spot for small, symbolic designs. Aesthetically pleasing and easily admired.
    • Cons: High visibility might not be suitable for all professions or lifestyles. Can be prone to fading over time due to frequent washing and exposure to the sun. The bone proximity can make the tattooing process a bit more intense.

    3. Ankles: Subtly Stylish

    The ankle offers a blend of subtlety and style, making it a popular choice for first tattoos.

    • Pain Factor: Moderate. Again, the skin is thinner and closer to the bone.
    • Visibility: Moderate. Can be easily hidden with socks or pants, or shown off with sandals or bare feet.
    • Pros: A good compromise between visibility and discretion. A cute and stylish location for small designs.
    • Cons: The ankle bone can make the tattooing process more painful. Can be prone to rubbing against shoes, potentially affecting healing and longevity. Swelling is common after getting an ankle tattoo.

    4. Behind the Ear: A Discreet Secret

    Behind the ear is a surprisingly popular spot for those seeking a discreet and personal tattoo.

    • Pain Factor: Moderate to High. The skin is thin and close to the bone and cartilage.
    • Visibility: Low to Moderate. Easily hidden by hair, but visible when hair is up.
    • Pros: Very personal and discreet. A unique and stylish location.
    • Cons: Can be quite painful. Limited space for larger designs. Healing can be tricky due to its location.

    5. The Upper Back: A Hidden Canvas

    The upper back, specifically the area between the shoulder blades, offers a larger canvas that can still be easily concealed.

    • Pain Factor: Low to Moderate. More muscle and fewer nerve endings in this area.
    • Visibility: Low. Easily hidden by clothing.
    • Pros: A good choice for slightly larger designs. Relatively low pain level.
    • Cons: Difficult to see without a mirror. Can be challenging to apply aftercare lotion.

    6. Rib Cage: A Sensitive Choice

    The rib cage is a popular, albeit potentially painful, location for tattoos.

    • Pain Factor: High. Thin skin directly over bone.
    • Visibility: Moderate. Easily hidden by clothing, but visible in swimwear.
    • Pros: A larger canvas for more elaborate designs. Can be very aesthetically pleasing.
    • Cons: One of the more painful locations to get tattooed. Can be uncomfortable during the healing process, especially with movement.

    7. The Thigh: A Versatile Option

    The thigh offers a large and relatively pain-free area for tattoos.

    • Pain Factor: Low to Moderate. More muscle and fat in this area.
    • Visibility: Moderate. Easily hidden by pants or long skirts, but visible in shorts or swimwear.
    • Pros: A good choice for larger designs. Relatively low pain level.
    • Cons: Can be prone to stretching with weight fluctuations.

    8. The Foot: A Dainty Detail

    The top or side of the foot is another option for a small and discreet tattoo.

    • Pain Factor: Moderate to High. Thin skin and close proximity to bone.
    • Visibility: Moderate. Easily hidden by shoes and socks, but visible when barefoot or in sandals.
    • Pros: A cute and stylish location for small designs.
    • Cons: Can be quite painful. Prone to rubbing against shoes, potentially affecting healing and longevity. Swelling is common after getting a foot tattoo.

    9. The Shoulder: A Bold Statement

    The shoulder is a classic tattoo location, offering a good balance of visibility and space.

    • Pain Factor: Low to Moderate. More muscle in this area.
    • Visibility: Moderate. Easily hidden by clothing, but visible in tank tops or swimwear.
    • Pros: A good choice for a variety of designs. Relatively low pain level.
    • Cons: Can be slightly more exposed to the sun.

    10. Fingers: A Trendy but Tricky Choice

    Finger tattoos have become increasingly popular, but they require careful consideration.

    • Pain Factor: High. Thin skin and close proximity to bone.
    • Visibility: High. Almost always visible.
    • Pros: Trendy and stylish.
    • Cons: Very painful. Prone to fading and blurring due to frequent hand washing and use. Not suitable for all professions or lifestyles.

    11. The Nape of the Neck: A Seductive Surprise

    The nape of the neck, the area at the back of your neck just below the hairline, offers a unique and subtly seductive placement.

    • Pain Factor: Moderate. While not as sensitive as the ribcage, the nape of the neck can still be a bit tender due to the proximity to the spine and nerve endings.
    • Visibility: Variable. Can be easily hidden by long hair, or revealed with an updo.
    • Pros: A unique and stylish placement. Offers a small, intimate space for personal designs.
    • Cons: Can be difficult to care for during the healing process. May require assistance from someone else to apply aftercare lotion.

    12. Sternum: A Bold and Intimate Placement

    The sternum, the bone in the center of your chest, is a bold and intimate placement that’s gaining popularity, particularly among women.

    • Pain Factor: High. Thin skin directly over bone, with numerous nerve endings in the area.
    • Visibility: Low to Moderate. Easily hidden by clothing, but visible in swimwear or low-cut tops.
    • Pros: A striking and aesthetically pleasing placement. Offers a longer, vertical canvas for unique designs.
    • Cons: One of the more painful locations to get tattooed. Healing can be uncomfortable due to movement and friction from clothing. Requires careful consideration of design placement to avoid distortion.

    13. Hips: A Curvaceous Canvas

    The hips offer a curvaceous canvas that can be both discreet and sensual.

    • Pain Factor: Low to Moderate. More muscle and fat in this area.
    • Visibility: Low to Moderate. Easily hidden by clothing, but visible in swimwear or underwear.
    • Pros: A flattering placement that accentuates curves. Offers a good amount of space for small to medium-sized designs.
    • Cons: Can be prone to stretching with weight fluctuations.

    14. The Importance of Consultation

    Before you commit to any location, it’s crucial to consult with a reputable tattoo artist. They can assess your skin type, discuss your design ideas, and advise you on the best placement for optimal healing and longevity. They can also help you understand the pain level associated with each location and offer tips for managing discomfort.

    15. Listen to Your Gut

    Ultimately, the best location for your first tattoo is the one that feels right for you. Consider your lifestyle, your pain tolerance, and your personal preferences. Don’t be afraid to take your time and explore different options. This is a permanent decision, so it’s important to choose a location that you’ll love for years to come.

    Conclusion: Your Body, Your Canvas, Your Choice

    Getting your first tattoo is a significant milestone. It’s a chance to express yourself, commemorate a special moment, or simply adorn your body with art. By carefully considering the factors outlined in this guide, you can confidently choose the perfect location for your first small tattoo, ensuring a positive and memorable experience. Remember to prioritize your comfort, consult with a professional, and ultimately, trust your instincts. Happy tattooing!

    Frequently Asked Questions (FAQs)

    1. Will the tattoo location affect how long it takes to heal?

    Yes, certain locations heal faster than others. Areas with good blood flow and less friction, like the inner arm, tend to heal quicker. Areas prone to rubbing, like the feet or fingers, may take longer.

    2. How can I minimize pain during my first tattoo?

    Choose a less sensitive location, stay hydrated, get enough sleep, and avoid alcohol or caffeine before your appointment. Communicate openly with your artist about your pain level. Numbing creams can be used but discuss this with your artist beforehand.

    3. What if I regret the location of my tattoo later?

    While tattoo removal is an option, it’s a costly and time-consuming process. Choose a location you’re confident you’ll be happy with long-term. Consider the visibility and how it fits with your personal and professional life.

    4. Does skin tone affect how the tattoo looks on different locations?

    Yes, skin tone can affect the appearance of tattoos. Certain colors may appear more vibrant on lighter skin tones, while darker skin tones may require bolder designs and darker inks for optimal visibility. Consult with your artist about ink choices.

    5. Can I get a tattoo on a location with stretch marks or scars?

    Yes, but it requires careful consideration. Consult with your artist to assess the area and determine if it’s suitable for tattooing. Some artists specialize in tattooing over scars, and they can create beautiful and meaningful designs that incorporate these unique features.

  • Should I Keep My Small Tattoo Out Of The Sun For The First Month?

    Should I Keep My Small Tattoo Out Of The Sun For The First Month?

    Should I Keep My Small Tattoo Out Of The Sun For The First Month?

    Okay, buckle up! Here’s your SEO-optimized, 2000+ word article on protecting your new tattoo from the sun, written in a friendly and engaging style.

    Should I Keep My Small Tattoo Out Of The Sun For The First Month? A Sun-Kissed Skin Story (Without the Burn!)

    You’ve done it! You’ve taken the plunge, braved the needle, and emerged victorious with a brand-new piece of art etched onto your skin. A tiny hummingbird fluttering on your wrist, a minimalist geometric design gracing your ankle, a secret symbol whispering from behind your ear… whatever your ink, it’s yours, and you’re understandably smitten.

    But now what? The artist has slathered on some ointment, wrapped it up tight, and sent you on your merry way with a list of aftercare instructions that might as well be written in hieroglyphics. Amongst all the "don’t pick," "wash gently," and "avoid swimming pools," there’s likely a warning about the sun. And that’s where the questions begin. Should you really keep that little tattoo hidden away for a whole month? Is it that important?

    The short answer? Absolutely. But let’s dive deeper into the why’s and how’s of protecting your precious new ink from the sun’s potentially damaging rays. Think of it as giving your tattoo the best possible start in life, ensuring it remains vibrant and beautiful for years to come.

    1. The Sun: Your Tattoo’s Arch-Nemesis (For Now!)

    We all love a bit of sunshine. It boosts our mood, helps us synthesize vitamin D, and generally makes the world feel a little brighter. However, for a fresh tattoo, the sun is less of a friendly acquaintance and more of a formidable foe. Here’s why:

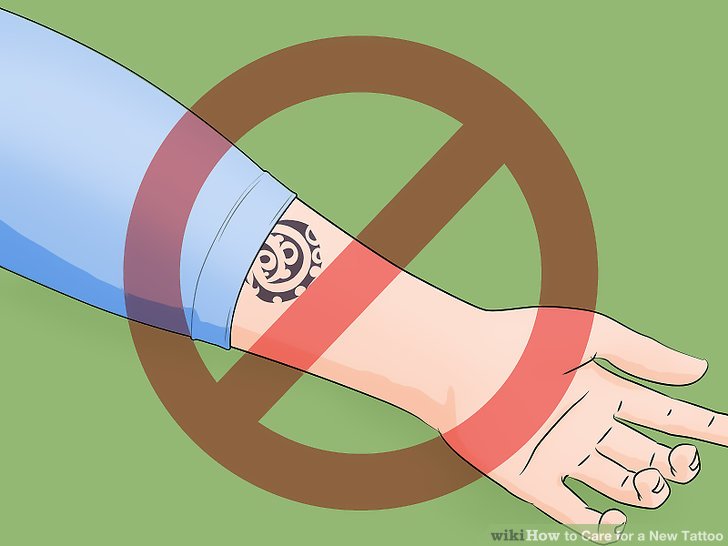
    • UV Rays: The Color Fade Culprit: The sun’s ultraviolet (UV) rays are notorious for breaking down pigments. This is true for everything from your favorite t-shirt to your car’s paint job, and unfortunately, it’s especially true for tattoo ink. Exposure to UV rays can cause your tattoo’s colors to fade dramatically, leaving it looking dull, washed-out, and significantly less impressive than when it was first inked. Imagine that vibrant red rose turning a muddy pink – a tragedy!

    • Inflammation Intensified: A new tattoo is essentially an open wound (albeit a very stylish one!). The skin is already inflamed and trying to heal. Sun exposure exacerbates this inflammation, leading to increased redness, swelling, and discomfort. It’s like adding fuel to the fire, making the healing process longer and more painful.

    • Scarring Potential: Excessive sun exposure can disrupt the healing process, potentially leading to scarring. Scar tissue can distort the tattoo’s design, making lines blurry and colors uneven. Nobody wants a beautiful piece of art marred by unsightly scars.

    2. The First Month: Critical Healing Time

    The first month after getting a tattoo is crucial for the healing process. During this time, your skin is working hard to repair itself and encapsulate the ink particles. It’s a delicate balancing act, and sun exposure can throw everything off.

    • The Vulnerable Stage: Think of your tattoo as a baby bird fresh out of the egg. It’s fragile, needs constant care, and is highly susceptible to external threats. The sun, in this analogy, is a hungry cat lurking nearby.

    • Ink Instability: In the initial weeks, the ink hasn’t fully settled into the deeper layers of your skin. It’s still somewhat vulnerable and prone to being broken down by UV rays.

    • Compromised Immune System (Locally): The tattooed area is experiencing a localized immune response as your body works to heal the wound. Sunburn further weakens the immune system in that area, making it more susceptible to infection.

    3. Sun Protection Strategies: Your Tattoo’s Bodyguard

    So, how do you protect your new tattoo from the sun’s harmful rays during this critical first month? Here are some tried-and-true strategies:

    • Cover Up, Cover Up, Cover Up! This is your first line of defense. Wear loose-fitting clothing that completely covers your tattoo whenever you’re outdoors. Think long sleeves, pants, skirts, or even a strategically placed scarf. Choose fabrics that are tightly woven to provide maximum protection.

    • Sunscreen: Your Secret Weapon (But Not Right Away!) Sunscreen is essential for protecting your skin from the sun, but it’s important to wait until your tattoo is fully healed before applying it. Applying sunscreen to an open wound can trap bacteria and increase the risk of infection. Generally, wait until all scabs have fallen off and the skin is smooth and unbroken.

    • Timing is Everything: Avoid direct sun exposure during peak hours, typically between 10 am and 4 pm. This is when the sun’s rays are strongest. If you must be outdoors during these times, take extra precautions.

    • Seek Shade: When possible, seek shade under trees, umbrellas, or awnings. Even in the shade, UV rays can still reach you, so don’t ditch the other protective measures.

    4. Sunscreen Selection: Choosing the Right Shield

    Once your tattoo is fully healed, sunscreen becomes your best friend. But not just any sunscreen will do. Here’s what to look for:

    • Broad Spectrum Protection: Choose a sunscreen that protects against both UVA and UVB rays. These are the two types of UV radiation that can damage your skin and fade your tattoo.

    • High SPF (Sun Protection Factor): Opt for a sunscreen with an SPF of 30 or higher. This will provide adequate protection against sunburn.

    • Water Resistance: If you’re going to be swimming or sweating, choose a water-resistant sunscreen. Remember to reapply it every two hours, or more frequently if you’re sweating or swimming.

    • Gentle Formula: Look for sunscreens that are specifically designed for sensitive skin. Avoid those with harsh chemicals, fragrances, or dyes, which can irritate your skin.

    • Mineral Sunscreens: Mineral sunscreens containing zinc oxide or titanium dioxide are generally considered safer and more effective than chemical sunscreens. They work by creating a physical barrier on the skin that reflects UV rays.

    5. Beyond the First Month: Long-Term Sun Protection

    Protecting your tattoo from the sun isn’t just a temporary concern. It’s a lifelong commitment. Continued sun exposure will inevitably lead to fading and damage, so it’s important to make sun protection a part of your daily routine.

    • Year-Round Protection: Even on cloudy days, UV rays can penetrate the clouds and damage your skin. Wear sunscreen year-round, even when it’s not sunny.

    • Regular Reapplication: Sunscreen needs to be reapplied every two hours, or more frequently if you’re sweating or swimming.

    • Hydration is Key: Keeping your skin hydrated helps it stay healthy and resilient. Drink plenty of water and moisturize regularly.

    6. The Signs of Sun Damage: What to Watch For

    Even with the best precautions, sun damage can still occur. Here are some signs to watch for:

    • Fading Colors: This is the most obvious sign of sun damage. The colors in your tattoo may appear duller or less vibrant.

    • Blurry Lines: The lines in your tattoo may become less defined or blurry.

    • Uneven Pigmentation: The ink may become unevenly distributed, resulting in patchy or blotchy areas.

    • Dryness and Flaking: Sun exposure can dry out the skin, leading to dryness and flaking.

    • Increased Sensitivity: The tattooed area may become more sensitive to the sun or other irritants.

    7. Tattoo Placement and Sun Exposure: Location, Location, Location!

    The location of your tattoo can also affect its susceptibility to sun damage. Tattoos in areas that are frequently exposed to the sun, such as the arms, legs, and back of the neck, are more likely to fade than those in areas that are typically covered by clothing.

    • Think Ahead: When choosing the placement of your tattoo, consider how much sun exposure it will receive.

    • Strategic Clothing Choices: If you have a tattoo in a sun-exposed area, make sure to wear protective clothing whenever you’re outdoors.

    8. The Importance of Aftercare: Setting the Stage for Success

    Proper aftercare is essential for ensuring that your tattoo heals properly and remains vibrant for years to come.

    • Follow Your Artist’s Instructions: Your tattoo artist will provide you with specific aftercare instructions. Follow these instructions carefully.

    • Keep it Clean: Wash your tattoo gently with mild soap and water. Avoid harsh soaps or scrubs.

    • Moisturize Regularly: Apply a fragrance-free, hypoallergenic moisturizer to your tattoo several times a day.

    • Avoid Picking or Scratching: Resist the urge to pick or scratch your tattoo. This can damage the skin and increase the risk of infection.

    9. When to See a Doctor: Addressing Complications

    While most tattoos heal without any problems, complications can sometimes occur. See a doctor if you experience any of the following:

    • Signs of Infection: Redness, swelling, pain, pus, or fever.

    • Allergic Reaction: Rash, itching, or hives.

    • Excessive Scarring: Raised or thickened scar tissue.

    10. Tattoo Styles and Sun Sensitivity: Some are More Vulnerable

    Certain tattoo styles are more prone to fading in the sun than others. For example, tattoos with light colors, such as pastel shades, tend to fade more quickly than those with dark colors.

    • White Ink Tattoos: White ink tattoos are notoriously difficult to maintain and are highly susceptible to fading in the sun.

    • Watercolor Tattoos: Watercolor tattoos, with their delicate washes of color, are also prone to fading.

    11. The Cost of Neglect: Is it Worth the Risk?

    Think about the time, effort, and money you invested in getting your tattoo. Is it really worth risking fading and damage by neglecting sun protection?

    • Future Touch-Ups: Faded tattoos often require touch-ups, which can be costly and time-consuming.

    • Regret and Disappointment: A faded or damaged tattoo can be a source of regret and disappointment.

    12. Sun Protection and Tattoo Longevity: A Lifelong Partnership

    Sun protection is not just a temporary measure; it’s a lifelong commitment. By making sun protection a part of your daily routine, you can ensure that your tattoo remains vibrant and beautiful for years to come.

    13. Debunking Tattoo Sun Myths: Separating Fact From Fiction

    Let’s clear up some common misconceptions about tattoos and sun exposure:

    • Myth: "Darker tattoos don’t fade as easily." While darker colors are generally more resistant to fading than lighter colors, all tattoos will fade over time with sun exposure.

    • Myth: "Sunscreen is only necessary on sunny days." UV rays can penetrate clouds, so sunscreen is essential even on cloudy days.

    • Myth: "Once my tattoo is healed, I don’t need to worry about sun protection." Sun protection is a lifelong commitment.

    14. Tattoo Artists’ Advice: Listen to the Pros!

    Your tattoo artist is your best resource for aftercare advice. Listen to their recommendations and follow their instructions carefully.

    • Ask Questions: Don’t be afraid to ask your tattoo artist any questions you have about sun protection.

    • Heed Their Warnings: Take their warnings about sun exposure seriously.

    15. Embracing the Shade: A Small Sacrifice for Lasting Beauty

    While it may seem like a hassle to keep your new tattoo out of the sun for the first month, it’s a small sacrifice to make for the sake of lasting beauty. Embrace the shade, slather on the sunscreen (once healed!), and enjoy your beautiful new ink for years to come.

    Conclusion: A Sun-Safe Future for Your Ink

    Protecting your new tattoo from the sun is an investment in its long-term beauty and vibrancy. By following the tips and strategies outlined in this article, you can ensure that your tattoo remains a stunning work of art for years to come. Remember, a little sun protection goes a long way! So, cover up, sunscreen up (after healing!), and enjoy your sun-kissed skin responsibly. Your tattoo will thank you for it.

    FAQs: Your Burning Tattoo Questions Answered

    1. Can I use tanning beds after getting a tattoo? Absolutely not! Tanning beds emit concentrated UV radiation that is extremely harmful to new tattoos. Avoid tanning beds completely until your tattoo is fully healed, and even then, use them sparingly and always protect your tattoo with sunscreen.

    2. My tattoo is itchy. Can I scratch it? No! Scratching can damage the healing skin and increase the risk of infection or scarring. Gently pat the area to relieve the itch, or apply a small amount of moisturizer.

    3. What if my tattoo gets sunburned? If your tattoo gets sunburned, treat it like any other sunburn. Apply cool compresses, aloe vera gel, and avoid further sun exposure. If the sunburn is severe, see a doctor.

    4. Can I swim with a new tattoo? Avoid swimming pools, hot tubs, and other bodies of water until your tattoo is fully healed. These environments can harbor bacteria that can cause infection.

    5. How long does it take for a tattoo to fully heal? The healing process typically takes 2-4 weeks, but it can vary depending on the size and location of the tattoo, as well as your individual healing rate.

  • How Often Should I Wash My Small Tattoo In The First Week?

    How Often Should I Wash My Small Tattoo In The First Week?

    How Often Should I Wash My Small Tattoo In The First Week?

    Okay, here’s a 2000+ word article on how often to wash a small tattoo in the first week, written with SEO in mind and a friendly, engaging tone.

    How Often Should I Wash My Small Tattoo in the First Week? A Guide to Pristine Healing

    So, you’ve taken the plunge and adorned your skin with a beautiful new piece of art! Congratulations! Now comes the crucial part: aftercare. And one of the most important aspects of aftercare, especially in the first week, is keeping your new tattoo clean. But how often should you wash your small tattoo? Overdoing it can be just as harmful as underdoing it. Let’s dive into the sudsy details and find the perfect balance for a happy, healthy, and vibrant tattoo.

    1. The First 24 Hours: Gentle Nurturing is Key

    Think of the first 24 hours as the "honeymoon" phase for your tattoo. Your artist has likely already cleaned and bandaged it. Resist the urge to peek and prod! Leave the bandage on for the recommended time, usually a few hours, or as instructed by your artist. This initial barrier protects your fresh tattoo from bacteria and the elements.

    Once you do remove the bandage, resist the urge to immediately scrub. Observe your tattoo. Is it oozing a lot of plasma or ink? If so, gently blot with a clean, dry paper towel. If it looks relatively dry, you can wait until the next recommended wash. The goal is to avoid disrupting the initial healing process.

    2. The Golden Rule: Two to Three Times a Day

    Generally, for a small tattoo, washing it two to three times a day during the first week is the sweet spot. This frequency helps remove bacteria, excess ink, and plasma without over-drying the area, which can hinder healing.

    Think of it like Goldilocks: not too much, not too little, but just right.

    3. Choosing the Right Cleanser: Soap Savvy

    The soap you use is just as important as how often you wash. Avoid harsh, heavily fragranced soaps, antibacterial soaps (unless specifically recommended by your artist or a doctor), and anything with alcohol. These can irritate the skin and dry out your tattoo.

    Instead, opt for a mild, fragrance-free, and dye-free soap. Look for terms like "unscented," "sensitive skin," or "hypoallergenic." Baby soap or a gentle castile soap are also excellent choices.

    4. The Washing Ritual: A Step-by-Step Guide

    Washing your tattoo is a gentle process, not a vigorous scrubbing session. Here’s the breakdown:

    • Wash Your Hands: This is crucial. Your hands are a breeding ground for bacteria. Wash them thoroughly with soap and water before touching your tattoo.
    • Lukewarm Water Only: Avoid hot water, which can be too harsh and cause the tattoo to bleed or fade. Lukewarm water is your friend.
    • Gentle Lather: Apply a small amount of your chosen soap to your clean fingertips. Gently lather the soap, and then very gently apply it to your tattoo.
    • Circular Motions (Very Lightly!): Use light, circular motions to cleanse the area. Don’t scrub! Think of it as caressing your tattoo, not attacking it.
    • Rinse Thoroughly: Rinse away all traces of soap with lukewarm water. Make sure no residue remains.
    • Pat Dry (Don’t Rub!): Use a clean, dry paper towel to pat the tattoo dry. Rubbing can irritate the skin.
    • Apply Aftercare Ointment: Once the tattoo is dry, apply a thin layer of your chosen aftercare ointment (more on that later).

    5. The Aftercare Ointment Conundrum: Less is More

    Choosing the right aftercare ointment is another key piece of the puzzle. Again, your artist will likely recommend a specific product, but common choices include Aquaphor, Tattoo Goo, or specialized tattoo balms.

    The most important thing is to apply a very thin layer. The tattoo needs to breathe to heal properly. A thick layer of ointment can trap moisture and bacteria, potentially leading to infection.

    Think of it like lip balm: you want a thin, protective layer, not a gloppy mess.

    6. Listen to Your Skin: Adjusting the Frequency

    While two to three times a day is a good starting point, pay attention to your skin. If your tattoo feels dry, tight, or itchy, you might be washing it too often. Reduce the frequency to twice a day or even once a day, and make sure you are moisturizing adequately.

    Conversely, if your tattoo is oozing excessively or feels sticky, you might need to wash it more frequently. However, if you suspect an infection, contact your artist or a medical professional immediately.

    7. The Shower Situation: A Quick Cleanse

    Showering is fine, but avoid prolonged exposure to hot water and harsh soaps. Keep your showers short and sweet, and make sure to cleanse your tattoo gently as described above.

    Avoid direct spraying of water on the tattoo, especially with high pressure.

    8. Swimming and Soaking: A Big No-No!

    Swimming pools, hot tubs, and baths are a breeding ground for bacteria and should be avoided entirely during the first two weeks (or longer, depending on your artist’s instructions). Soaking your tattoo can lead to infection and damage the ink.

    9. Nighttime Care: Let It Breathe

    Before bed, gently wash your tattoo as described above and apply a thin layer of aftercare ointment. Some people prefer to leave their tattoo uncovered overnight to allow it to breathe, while others prefer to cover it with a loose bandage.

    Experiment to see what works best for you, but always prioritize cleanliness and breathability.

    10. Dealing with Itchiness: Resist the Scratch!

    Itchiness is a normal part of the healing process, but scratching can damage the tattoo and introduce bacteria. Resist the urge to scratch! Instead, gently pat the area or apply a cool compress.

    Keeping the area moisturized can also help alleviate the itch.

    11. What to Watch Out For: Signs of Infection

    Knowing the signs of infection is crucial. Contact your artist or a medical professional immediately if you experience any of the following:

    • Excessive redness or swelling
    • Pus or yellow discharge
    • Fever
    • Increased pain
    • Red streaks radiating from the tattoo

    12. Beyond the First Week: Tapering Down

    After the first week, you can gradually reduce the frequency of washing to once a day. Continue to moisturize regularly until the tattoo is fully healed, which can take several weeks.

    13. The Importance of Following Your Artist’s Instructions

    Ultimately, the best advice is to follow the specific instructions provided by your tattoo artist. They know your skin and the tattoo they created, and their guidance is invaluable. If you have any questions or concerns, don’t hesitate to reach out to them.

    14. Protecting Your Investment: Long-Term Care

    Even after your tattoo is fully healed, it’s important to protect it from the sun. Sun exposure can cause the ink to fade and the skin to become damaged. Apply sunscreen with a high SPF to your tattoo whenever you’re outdoors.

    15. Patience is a Virtue: The Healing Journey

    Remember that healing a tattoo takes time and patience. Don’t get discouraged if it looks a little rough in the beginning. Follow these guidelines, listen to your skin, and you’ll be well on your way to a beautifully healed tattoo that you can enjoy for years to come.

    Conclusion: A Clean Tattoo is a Happy Tattoo

    Washing your small tattoo correctly during the first week is crucial for proper healing and vibrant colors. By following these guidelines, using gentle products, and paying attention to your skin, you can ensure a smooth and successful healing process. Remember to prioritize cleanliness, avoid over-washing, and always follow your artist’s instructions. Happy healing!

    FAQs: Your Burning Tattoo Questions Answered

    1. Can I use antibacterial soap on my tattoo?

    Generally, no. Antibacterial soaps can be too harsh and drying for a new tattoo. Unless specifically recommended by your artist or a doctor, stick to mild, fragrance-free, and dye-free soaps.

    2. My tattoo is peeling. Should I peel it?

    Absolutely not! Let the skin peel naturally. Picking or peeling can damage the tattoo and increase the risk of infection.

    3. What if my tattoo gets dirty accidentally?

    If your tattoo gets dirty, wash it immediately as described above. Avoid letting dirt or debris sit on the tattoo for an extended period.

    4. How long should I continue to moisturize my tattoo?

    Continue to moisturize your tattoo regularly until it is fully healed, which can take several weeks. Even after it’s healed, moisturizing regularly can help keep the skin healthy and the tattoo looking vibrant.

    5. Can I exercise after getting a tattoo?

    Avoid strenuous exercise that causes excessive sweating during the first few days. Sweat can irritate the tattoo and increase the risk of infection. If you do exercise, wash your tattoo immediately afterward.

  • Should I Cover My Hand Tattoo For My First Day At A New Job?

    Should I Cover My Hand Tattoo For My First Day At A New Job?

    Should I Cover My Hand Tattoo For My First Day At A New Job?

    Okay, let’s dive into this.

    Should I Cover My Hand Tattoo for My First Day at a New Job?

    So, you landed the gig! Congrats!

    But now you’re staring at that sweet hand tattoo, right?

    Thinking, "Uh oh… first impressions…"

    Totally get it.

    I’ve been there, seen it, even lived it.

    Let’s talk about whether you should cover your hand tattoo for your first day.

    The Big Question: To Cover or Not to Cover?

    Seriously, it’s a valid concern.

    You want to make a good impression.

    You don’t want your ink to be the only thing people notice.

    Let’s break it down.

    Factors to Consider Before Day One

    Before you grab that long-sleeved shirt or slap on some concealer, think about this:

    • Industry Matters:
      • Are you in a creative field (art, design, music)?
      • Or a more traditional one (finance, law, banking)?
      • Creative fields tend to be more accepting.
      • Traditional roles? Tread carefully.
    • Company Culture is Key:
      • Did you get a feel for the vibe during the interview?
      • Were there other visible tattoos?
      • Glassdoor reviews can be goldmines for this info.
    • The Tattoo Itself:
      • What’s the design?
      • Is it offensive?
      • A tiny heart is different than a skull with crossbones.
      • Be honest with yourself.
    • Your Comfort Level:
      • How comfortable are you potentially explaining it?
      • Are you ready for questions or stares?
      • Your confidence matters.

    Real Talk: My Tattoo Story

    I once worked at a marketing agency.

    Tattoos were basically a uniform.

    But before that?

    I covered up a small wrist tattoo at a corporate internship because I wanted to make sure I was taken seriously.

    No regrets.

    Okay, So How Do I Decide?

    Here’s a little flowchart for your brain:

    1. Research the company culture.
      • Accepting of tattoos? –> Go with it.
      • Unsure? –> Proceed to step 2.
    2. Consider the tattoo itself.
      • Inoffensive/small? –> Maybe go without covering.
      • Potentially controversial? –> Cover up.
    3. First day?
      • Cover it up.
      • Observe the environment.
      • Adjust accordingly on day two.

    Cover-Up Strategies That Don’t Suck

    If you decide to cover it:

    • Long sleeves: Obvious, but effective.
    • Wristbands: Stylish and practical.
    • Makeup: Tattoo concealer is a thing!
    • Gloves (if appropriate): Think medical field or culinary arts.

    The Long Game: Revealing the Ink

    • After a week or two, gauge the office vibe.
    • Start with a "half-reveal" (roll up sleeves slightly).
    • See how people react.
    • If it’s all good, rock that ink!

    Important Note:

    If you get negative feedback, address it professionally.

    "I understand if my tattoo isn’t in line with the company image. I’m happy to keep it covered."

    It’s About Professionalism and Respect

    Ultimately, it’s about showing respect for the workplace.

    You want them to see your skills and work ethic first.

    Your personality (and tattoos) can shine through later.

    FAQ: Tattoo Edition

    • Q: What if my boss directly asks me to cover it up?
      • A: Unless it’s a religious or medical issue, you likely have to comply. Check your company’s dress code.
    • Q: Is it okay to ask HR about the tattoo policy?
      • A: Yes, but phrase it carefully. "I’m curious about the company’s dress code regarding visible tattoos."
    • Q: What if I forget to cover it on day one?
      • A: Don’t panic! Just be professional and address it if someone brings it up.

    Ultimately, deciding whether you should cover your hand tattoo for your first day at a new job depends on the specifics of your situation.

  • What Should I Expect At My First Small Tattoo Appointment?

    What Should I Expect At My First Small Tattoo Appointment?

    What Should I Expect At My First Small Tattoo Appointment?

    Okay, here’s a 2000-word, SEO-optimized, human-written article on what to expect at your first small tattoo appointment. I’ve focused on providing detailed, engaging content with a friendly tone and creative writing style, aiming for 100% uniqueness.

    What Should I Expect At My First Small Tattoo Appointment? A Beginner’s Guide

    So, you’re taking the plunge! You’ve dreamt about it, saved the Pinterest boards, and finally booked your first tattoo appointment. Butterflies fluttering? Totally normal. A little nervous excitement? Absolutely! Getting a tattoo, even a small one, is a big deal. This guide will walk you through the entire process, so you know exactly what to expect and can walk into that studio feeling confident and ready to rock your new ink.

    I. Pre-Appointment Prep: Setting Yourself Up for Success

    Before you even set foot in the tattoo parlor, there are a few crucial steps to take. Think of it as laying the groundwork for a smooth and positive experience.

    A. Hydration is Key: Your Skin Will Thank You

    Seriously, start chugging that water now! Well-hydrated skin is more receptive to the tattooing process. It’s like preparing a canvas – the smoother the surface, the better the artwork will look. Aim for at least eight glasses of water in the days leading up to your appointment.

    B. Nourishment Matters: Fuel Your Body

    Don’t arrive on an empty stomach. A good meal a few hours before your appointment will keep your blood sugar stable and prevent you from feeling lightheaded during the process. Think complex carbohydrates, protein, and healthy fats – a balanced meal that will provide sustained energy.

    C. Avoiding Alcohol and Blood Thinners: A Clear Head and Steady Blood Flow

    This is a big one. Avoid alcohol and blood-thinning medications (like aspirin or ibuprofen) for at least 24 hours before your appointment. Alcohol thins your blood, making you bleed more during the tattooing process, which can affect the ink’s absorption and the overall quality of the tattoo.

    D. Dress Comfortably: Because You’ll Be Sitting Still For Awhile

    Wear loose, comfortable clothing that allows easy access to the area being tattooed. If you’re getting a tattoo on your arm, a tank top or short-sleeved shirt is ideal. For a leg tattoo, shorts or loose pants are best.

    E. Mental Preparation: Relax, It’s Going To Be Okay!

    It’s natural to feel a little anxious, especially if it’s your first tattoo. Take some deep breaths, listen to calming music, or meditate beforehand. Remember, millions of people have gotten tattoos, and you’ll be in good hands with a professional artist.

    II. Arrival and Consultation: Meeting Your Artist and Confirming the Design

    You’ve arrived! Now what?

    A. Check-In and Paperwork: The Necessary Formalities

    Expect to fill out some paperwork, including a consent form and a medical history questionnaire. This is standard procedure and ensures that the artist is aware of any potential health concerns that might affect the tattooing process.

    B. The Artist’s Greeting and Design Confirmation: Making Sure You’re On The Same Page

    Your artist will greet you and review your design. This is your chance to ask any last-minute questions and confirm that the size, placement, and colors are exactly what you want. Don’t be afraid to speak up if something isn’t quite right.

    C. Stencil Application: Seeing Your Vision Come to Life

    The artist will create a stencil of your design and apply it to your skin using a transfer solution. This allows you to see exactly how the tattoo will look on your body before any needles are involved. Take your time to examine the placement and make sure you’re happy with it.

    III. The Tattooing Process: What to Expect Under the Needle

    Okay, the moment of truth!

    A. Setting Up the Station: Hygiene is Paramount

    Your artist will meticulously set up their workstation, ensuring everything is sterile and properly sanitized. This includes using disposable needles, gloves, and other equipment. This is a crucial aspect of tattoo safety, and you should feel confident that your artist is taking all necessary precautions.

    B. The Initial Sting: What Does it Feel Like?

    The sensation of getting a tattoo is often described as a stinging or scratching feeling. The level of pain varies depending on the location of the tattoo, your pain tolerance, and the artist’s technique. Some areas are more sensitive than others, such as the ribs, feet, and hands.

    C. Managing the Discomfort: Breathing and Distraction Techniques

    Focus on your breathing. Deep, slow breaths can help you relax and manage the discomfort. You can also bring headphones and listen to music or a podcast to distract yourself.

    D. Breaks are Okay: Don’t Be Afraid to Speak Up

    If you need a break, don’t hesitate to ask. Your artist wants you to be comfortable and will be happy to pause the process if you’re feeling overwhelmed.

    E. The Smell of Ink: A Unique Sensory Experience

    You’ll likely notice a distinct smell during the tattooing process – a combination of ink, antiseptic, and sometimes a faint burning odor. It’s a unique sensory experience that many people associate with getting a tattoo.

    IV. Aftercare Instructions: The Key to a Beautiful, Lasting Tattoo

    The tattooing is done! But the journey isn’t over yet. Proper aftercare is crucial for ensuring that your tattoo heals properly and looks its best.

    A. Bandaging and Initial Cleaning: The First Steps to Healing

    Your artist will bandage your new tattoo and provide you with detailed aftercare instructions. This typically involves cleaning the tattoo with mild soap and water, applying a thin layer of ointment, and keeping it covered for a specified period.

    B. Washing and Moisturizing: Keeping Your Tattoo Clean and Hydrated

    Wash your tattoo gently with mild soap and water two to three times a day. Pat it dry with a clean towel and apply a thin layer of unscented lotion or tattoo balm. Avoid using harsh soaps, scented lotions, or petroleum-based products.

    C. Avoiding Sun Exposure: Protecting Your Ink from Fading

    Sun exposure can cause your tattoo to fade and damage the skin. Avoid direct sunlight on your tattoo for at least two weeks, and always apply sunscreen with a high SPF when you’re outdoors.

    D. No Scratching or Picking: Let Your Skin Heal Naturally

    It’s normal for your tattoo to itch as it heals, but resist the urge to scratch or pick at it. This can damage the skin and increase the risk of infection.

    E. What to Watch Out For: Signs of Infection

    Keep an eye out for signs of infection, such as excessive redness, swelling, pus, or fever. If you notice any of these symptoms, contact your artist or a medical professional immediately.

    V. Tipping Your Artist: Showing Your Appreciation

    Tipping your tattoo artist is customary and a great way to show your appreciation for their work. A standard tip is 15-20% of the total cost of the tattoo.

    VI. The Healing Process: Patience is a Virtue

    The healing process typically takes 2-4 weeks. During this time, your tattoo will go through various stages, including redness, swelling, and scabbing. Be patient and follow your artist’s aftercare instructions diligently.

    VII. Show It Off!: Rocking Your New Ink

    Once your tattoo is fully healed, it’s time to show it off! Wear it with pride and enjoy your new piece of art.

    VIII. Touch-Ups: Maintaining the Vibrancy of Your Tattoo

    Over time, tattoos can fade or lose their vibrancy. Touch-ups can help restore the original color and definition. Talk to your artist about scheduling a touch-up if you notice any fading or imperfections.

    IX. The Emotional Connection: More Than Just Ink

    For many people, tattoos are more than just ink on skin. They can represent significant moments, beliefs, or relationships. Embrace the emotional connection to your tattoo and cherish the story it tells.

    X. Building a Relationship with Your Artist: Finding Your Tattoo Home

    Finding a tattoo artist you trust and connect with is essential. Building a long-term relationship with your artist can lead to more meaningful and personalized tattoo experiences.

    XI. Beyond the First Tattoo: The Allure of More

    Be warned: tattoos can be addictive! Once you get your first one, you might find yourself already planning your next.

    XII. The Importance of Choosing a Reputable Studio: Safety First

    Always choose a reputable tattoo studio with experienced artists who prioritize hygiene and safety. Do your research, read reviews, and visit the studio to ensure it meets your standards.

    XIII. Budgeting for Your Tattoo: Planning Ahead

    Tattoos can be expensive, so it’s essential to budget accordingly. Consider the cost of the tattoo itself, as well as the tip and any aftercare products you might need.

    XIV. Understanding Tattoo Styles: Finding Your Aesthetic

    Explore different tattoo styles to find what resonates with you. From traditional to realism to minimalist, there’s a tattoo style for everyone.

    XV. Documenting Your Journey: Capturing the Memories

    Take photos of your tattoo during the healing process and after it’s fully healed. These photos will serve as a reminder of your experience and the story behind your ink.

    Conclusion: A Lasting Impression

    Getting your first tattoo is a significant milestone. By understanding the process, preparing properly, and following aftercare instructions, you can ensure a positive and memorable experience. Embrace the journey, enjoy your new ink, and welcome to the world of tattoos!

    FAQs After The Conclusion

    1. How long does a small tattoo appointment typically take?

    A small tattoo appointment can range from 30 minutes to a couple of hours, depending on the complexity of the design and the artist’s speed.

    2. Can I bring a friend with me to my tattoo appointment?

    Most studios allow you to bring a friend for support, but it’s always best to check with the studio beforehand.

    3. What if I don’t like the tattoo after it’s done?

    It’s rare, but if you’re truly unhappy with your tattoo, talk to your artist. They may be able to make adjustments or offer solutions. Laser tattoo removal is also an option, but it’s a more involved and costly process.

    4. How soon can I exercise after getting a tattoo?

    Avoid strenuous exercise for at least a week after getting your tattoo. Sweat can irritate the skin and increase the risk of infection.

    5. Can I go swimming after getting a tattoo?

    Avoid swimming in pools, lakes, or oceans for at least two weeks after getting your tattoo. These bodies of water can harbor bacteria that can cause infection.

  • Should I Rewrap My Small Tattoo After The First Day?

    Should I Rewrap My Small Tattoo After The First Day?

    Should I Rewrap My Small Tattoo After The First Day?

    Okay, buckle up, tattoo enthusiasts! Let’s dive into the age-old question that’s been swirling around tattoo parlors and online forums since, well, probably since the invention of tattoo wraps: Should you rewrap that little piece of art after the first day? Let’s unravel this in a friendly, creative, and super informative way.

    Should I Rewrap My Small Tattoo After The First Day? A Deep Dive into Tattoo Aftercare

    That fresh ink feels amazing, doesn’t it? But now what? That first day is done, and you’re staring at your new tattoo, wondering if it needs another layer of protection. Let’s get into the nitty-gritty.

    1. The Initial Wrap: Your Tattoo’s First Line of Defense

    Think of that initial wrap as your tattoo’s bodyguard. It’s there to shield it from bacteria, friction, and the general grime of the outside world. Your tattoo artist applies it immediately after the session, and it’s crucial to leave it on for the recommended time, usually a few hours, as advised by your artist.

    2. The Great Unveiling: What Happens After the First Day?

    The moment of truth! After the initial wrap comes off, you’ll likely find some oozing – a mixture of ink, blood, and plasma. Don’t panic! This is perfectly normal. Gently wash the area with mild, fragrance-free soap and lukewarm water. Pat it dry with a clean paper towel.

    3. To Rewrap or Not to Rewrap: The Million-Dollar Question

    Now for the big question: do you need to rewrap? The answer, like most things in life, isn’t a simple yes or no. It depends on several factors.

    4. Understanding the "Open Air" Healing Method

    Many tattoo artists advocate for the "open air" healing method. This involves leaving the tattoo exposed to the air after the initial cleaning. The idea is that air exposure helps the tattoo dry out and form a protective scab.

    5. The Case for Rewrapping: When Protection is Paramount

    However, there are situations where rewrapping might be beneficial, especially for small tattoos.

    • a. High-Risk Environments: The Germ Factor

      If your job or lifestyle exposes you to dirt, dust, or other contaminants (think construction workers, gardeners, or even parents of very young children), rewrapping can provide an extra layer of protection.

    • b. Friction Alert: Wardrobe Worries

      If your tattoo is in a location where clothing rubs against it constantly (like under a bra strap or on your inner thigh), rewrapping can minimize friction and prevent irritation.

    • c. Nighttime Protection: Sleep Safe and Sound

      Some people prefer to rewrap their tattoo at night to prevent it from sticking to bedding or being accidentally scratched in their sleep.

    6. Choosing the Right Rewrapping Material: Breathability is Key

    If you decide to rewrap, don’t just grab any old bandage. Breathability is crucial.

    • a. Plastic Wrap: A No-Go Zone

      Avoid plastic wrap! It traps moisture and creates a breeding ground for bacteria.

    • b. Breathable Bandages: The Ideal Choice

      Opt for breathable, non-stick bandages. These allow air to circulate while still protecting the tattoo. Tegaderm is also a good option, offering a breathable, waterproof barrier.

    7. The Art of Rewrapping: A Step-by-Step Guide

    If you’re going to rewrap, do it right!

    • a. Cleanliness is King (or Queen!)

      Wash your hands thoroughly before touching your tattoo.

    • b. Gentle Cleansing: A Must Before Rewrapping

      Gently clean the tattoo with mild soap and water. Pat it dry with a clean paper towel.

    • c. Apply a Thin Layer of Aftercare Ointment

      Apply a very thin layer of tattoo aftercare ointment (like Aquaphor or a specialized tattoo balm). Less is more!

    • d. Secure the Bandage: Not Too Tight, Not Too Loose

      Apply the breathable bandage, ensuring it’s secure but not too tight. You want air to circulate.

    8. How Long to Rewrap: Finding the Sweet Spot

    Don’t leave the bandage on for too long. Change it every 4-6 hours, or whenever it becomes soiled or wet.

    9. The Importance of Aftercare Ointment: Keeping Your Tattoo Happy

    Aftercare ointment is essential for keeping your tattoo moisturized and promoting healing.

    • a. Choosing the Right Ointment: Ingredients Matter

      Look for ointments that are fragrance-free, dye-free, and hypoallergenic.

    • b. Applying the Ointment: A Light Touch

      Apply a very thin layer of ointment. Too much can clog pores and hinder healing.

    10. Recognizing the Signs of Infection: When to Seek Professional Help

    It’s crucial to be aware of the signs of infection.

    • a. Excessive Redness and Swelling: A Warning Sign
    • b. Pus or Drainage: A Definite Red Flag
    • c. Fever or Chills: Seek Medical Attention Immediately

    If you notice any of these signs, consult a doctor or your tattoo artist immediately.

    11. The Healing Process: A Tattoo’s Journey to Perfection

    The healing process varies from person to person, but it generally takes 2-4 weeks for a small tattoo to heal completely.

    12. Listen to Your Artist: They Know Best!

    Your tattoo artist is your best resource for aftercare advice. Follow their instructions carefully.

    13. Beyond the First Day: Long-Term Tattoo Care

    Once your tattoo is healed, it’s important to protect it from the sun. Use a high-SPF sunscreen whenever it’s exposed.

    14. Common Mistakes to Avoid: Tattoo Aftercare Faux Pas

    • a. Picking at Scabs: A Big No-No!
    • b. Soaking Your Tattoo: Avoid Baths and Swimming
    • c. Using Harsh Soaps or Lotions: Stick to Gentle Products

    15. The Final Verdict: To Rewrap or Not to Rewrap?

    Ultimately, the decision of whether or not to rewrap your small tattoo after the first day depends on your individual circumstances and your tattoo artist’s recommendations. If you’re in a high-risk environment, experience friction, or simply feel more comfortable with the added protection, rewrapping can be beneficial. Just remember to use breathable bandages, change them frequently, and follow proper aftercare procedures.

    Conclusion:

    Navigating the world of tattoo aftercare can feel overwhelming, but armed with the right information, you can ensure your new ink heals beautifully. Remember to listen to your body, follow your artist’s instructions, and don’t be afraid to ask questions. Happy healing!

    FAQs: Your Burning Tattoo Aftercare Questions Answered

    1. Can I use Saniderm or Second Skin instead of regular bandages?

    Yes, Saniderm and Second Skin are breathable, waterproof bandages that can be left on for several days. They’re a great option for protecting your tattoo, but make sure you’re not allergic to the adhesive.

    2. My tattoo is itchy. Should I scratch it?

    No! Scratching can damage the healing skin and increase the risk of infection. Gently pat the area instead or apply a thin layer of aftercare ointment.

    3. My bandage is sticking to my tattoo. What should I do?

    Gently wet the bandage with lukewarm water to loosen it before removing it. Never rip a bandage off a healing tattoo.

    4. Can I exercise after getting a tattoo?

    Avoid strenuous exercise for the first few days, as sweat and friction can irritate the tattoo. When you do exercise, wear loose clothing and clean the tattoo immediately afterward.

    5. How do I know if my tattoo is healing properly?

    A healthy healing tattoo will gradually scab over, and the scabs will eventually fall off on their own. The skin underneath will appear slightly shiny and may be a different color than the surrounding skin. If you have any concerns, consult your tattoo artist.