Tag: transfer

  • Can I Print My Own Custom Sunflower Tattoo Transfer?

    Can I Print My Own Custom Sunflower Tattoo Transfer?

    Can I Print My Own Custom Sunflower Tattoo Transfer?

    Okay, let’s dive into this tattoo transfer thing.

    Ever wondered, "Can I really print my own custom sunflower tattoo transfer?"

    It’s a legit question.

    You’re itching for some fresh ink, but maybe a full-blown tattoo is too much commitment.

    Or maybe you just want to test out a design before going permanent.

    I get it.

    I’ve been there, staring at my computer screen, wondering if this DIY tattoo transfer thing is actually possible.

    Well, let’s break it down.

    Can I Print My Own Custom Sunflower Tattoo Transfer? The Short Answer.

    Yes, you can print your own custom sunflower tattoo transfer.

    But…

    There are definitely some things you need to know.

    It’s not as simple as printing on regular paper and slapping it on your skin.

    Trust me, I tried that once with a temporary tattoo kit – total disaster!

    What You’ll Need to Print Your Own Sunflower Tattoo Transfer.

    Okay, so you’re ready to give this a shot?

    Here’s what you’ll need to gather:

    • Tattoo Transfer Paper: This is the most important thing. It’s specially coated to release the design onto your skin. Regular paper won’t work.
    • An Inkjet or Laser Printer: Check the transfer paper instructions to see which type of printer it’s compatible with. Most are designed for inkjet printers. I recommend doing a test print first!
    • Your Sunflower Design: Obviously! Make sure it’s high-resolution so it looks crisp and clean.
    • Image Editing Software (Optional): If you need to resize, flip, or adjust your design. I use Canva for quick edits.
    • Scissors: For cutting out the transfer.
    • A Damp Cloth or Sponge: To apply the transfer.
    • Patience: Seriously, this might take a couple of tries to get right.
    • Rubbing Alcohol: To clean the area before applying the tattoo.

    The Process: Printing Your Sunflower Tattoo Transfer.

    Alright, let’s get down to business.

    Here’s a step-by-step guide:

    1. Prepare Your Design: This is key. Make sure your sunflower design is the right size and orientation. Remember that it will be mirrored when applied to your skin, so flip it horizontally in your image editing software before printing.
    2. Load the Transfer Paper: Follow the instructions that came with your transfer paper exactly. Usually, you’ll need to load it face-down in your printer’s paper tray.
    3. Print the Design: Select the correct paper type in your printer settings (usually a photo paper or glossy paper setting works well). Do a test print on regular paper first to make sure the size and placement are correct.
    4. Cut Out the Transfer: Carefully cut around the design, leaving a small border.
    5. Clean Your Skin: Use rubbing alcohol to clean the area where you want to apply the tattoo. This removes oils and helps the transfer stick better.
    6. Apply the Transfer: Peel off the backing from the transfer paper. Place the sticky side down on your skin.
    7. Dampen the Backing: Use a damp cloth or sponge to thoroughly wet the back of the transfer paper.
    8. Hold Firmly: Press down firmly for the amount of time specified in the transfer paper instructions (usually 30-60 seconds).
    9. Carefully Peel Off the Paper: Slowly peel off the paper backing. If the tattoo isn’t transferring properly, press down again and dampen the paper some more.
    10. Let it Dry: Let the tattoo dry completely before touching it.

    Tips for a Killer Sunflower Tattoo Transfer.

    Here are a few things I’ve learned along the way:

    • Choose the Right Transfer Paper: Not all transfer papers are created equal. Read reviews and choose one that’s specifically designed for temporary tattoos.
    • High-Quality Design = High-Quality Tattoo: The better your design, the better the transfer will look. Don’t use blurry or pixelated images.
    • Placement Matters: Avoid areas that are constantly rubbing against clothing or getting wet.
    • Seal It (Optional): Some people use a light dusting of hairspray to seal the tattoo and make it last longer. I haven’t personally tried this, but it’s worth experimenting with.
    • Practice Makes Perfect: Don’t be discouraged if your first attempt isn’t perfect. Keep practicing, and you’ll get the hang of it.
    • Consider a Tattoo Stencil Kit: If you want a more advanced method, look into these.

    How Long Will My Sunflower Tattoo Transfer Last?

    Generally, these temporary tattoos last anywhere from 1 to 5 days, depending on the quality of the transfer paper, your skin type, and how well you take care of it.

    Avoid scrubbing the area and try not to get it too wet.

    Is it Safe?

    Most tattoo transfer papers are non-toxic and safe for skin contact.

    However, it’s always a good idea to do a patch test on a small area of skin before applying the tattoo.

    If you experience any irritation or allergic reaction, remove the tattoo immediately and discontinue use.

    FAQ About Printing Your Own Custom Sunflower Tattoo Transfer

    • Can I use any printer?
      • No. Check the transfer paper instructions to see which type of printer (inkjet or laser) it’s compatible with.
    • Will it look exactly like a real tattoo?
      • No, it won’t. It will look like a temporary tattoo.
    • How do I remove the tattoo?
      • You can remove it with rubbing alcohol, baby oil, or even strong adhesive tape.
    • Can I use this on my face?
      • It’s generally not recommended to use these types of transfers on your face, especially near your eyes.
    • Can I get waterproof tattoo transfers?
      • Yes, you can find waterproof temporary tattoo papers. However, they may not be completely waterproof and might fade with prolonged exposure to water.

    So, there you have it.

    Printing your own custom sunflower tattoo transfer is totally doable.

    Just remember to use the right materials, follow the instructions carefully, and have fun with it!

    Now go create some awesome temporary body art and remember, you can print your own custom sunflower tattoo transfer.

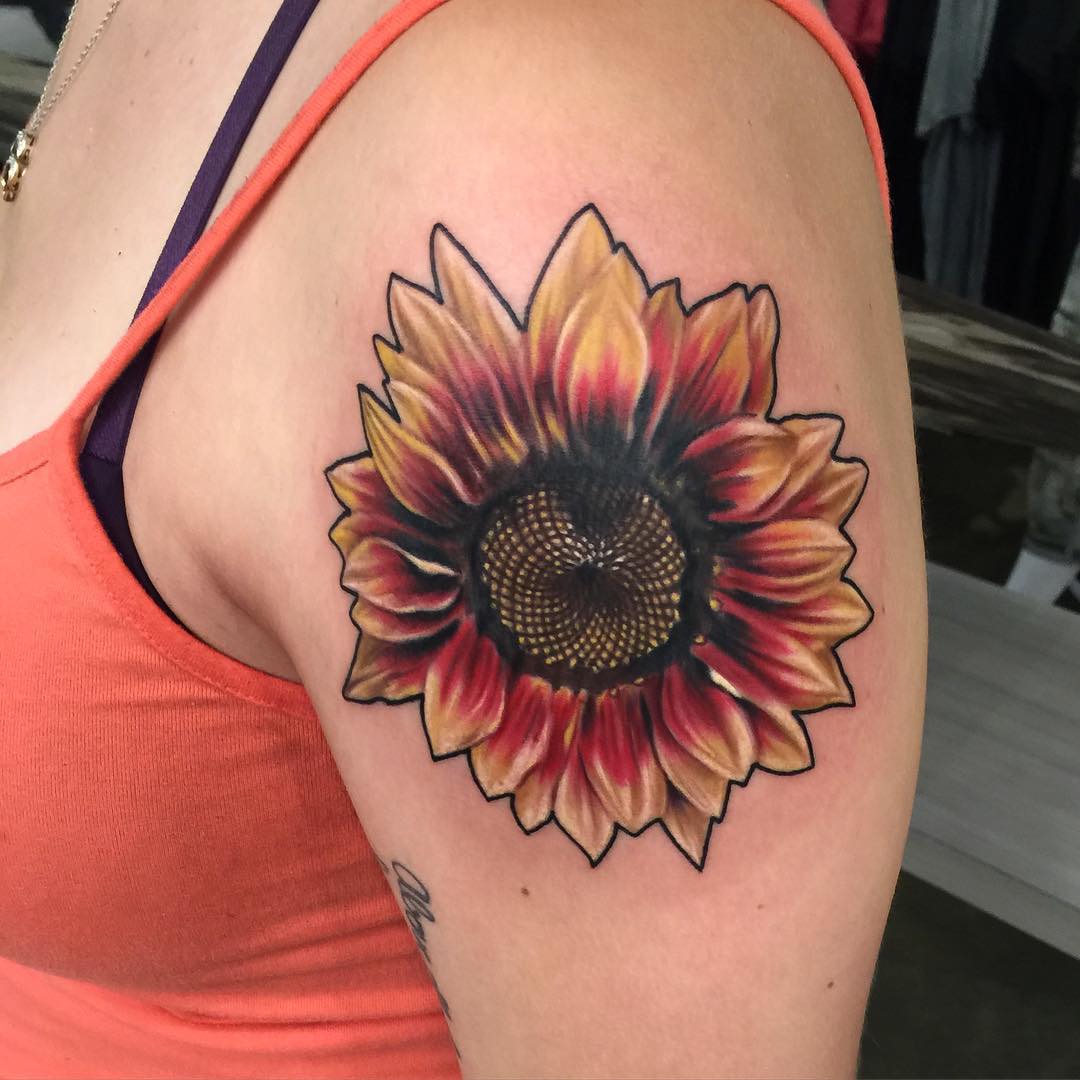
  • How Do I Transfer A Sunflower Tattoo Design Onto Skin?

    How Do I Transfer A Sunflower Tattoo Design Onto Skin?

    How Do I Transfer A Sunflower Tattoo Design Onto Skin?

    Okay, so you’ve got this killer sunflower tattoo design.

    Now what?

    You’re probably thinking, "How do I actually get this beautiful thing onto my skin?"

    I get it.

    That first transfer can be nerve-wracking.

    Let’s walk through this.

    How Do I Transfer A Sunflower Tattoo Design Onto Skin?

    It’s not rocket science, but it does require some attention to detail.

    Think of it like baking a cake, only instead of frosting, you’re using ink.

    Choosing Your Transfer Method

    Alright, there are a few ways to skin this cat…or, you know, transfer this sunflower.

    Each has its pros and cons.

    Here’s the lowdown:

    • Stencil Paper (Hectograph): This is the most common method pros use.

      It involves a special paper, a design, and a transfer cream.

      You either hand-draw the design onto the stencil or use a thermal copier.

      • Pros: Super precise, long-lasting on the skin.
      • Cons: Requires specific materials, can be a bit messy.
    • Freehand: Exactly what it sounds like.

      You draw directly onto the skin with a skin-safe marker.

      • Pros: Great for custom work, no special equipment needed.
      • Cons: Requires artistic skill, less precise.
    • Printer Transfer: You print your design onto transfer paper using a regular inkjet or laser printer.

      • Pros: Easy if you have a printer, good for complex designs.
      • Cons: Can be less durable than stencil paper, ink can smudge.

    My Personal Preference:

    I usually stick with stencil paper because I like the accuracy.

    Plus, I have a thermal copier, so it’s pretty quick.

    But for smaller, simpler designs, freehanding can be a fun way to go.

    Step-by-Step: Using Stencil Paper for Your Sunflower

    Okay, let’s get into the nitty-gritty of using stencil paper.

    1. Prepare Your Skin: This is crucial.

      Clean the area with antibacterial soap and shave if necessary.

      Dry the area completely.

      This prevents infection and ensures the stencil adheres properly.

    2. Apply Transfer Cream/Gel: Use a thin, even layer.

      Too much, and the stencil will smear.

      Too little, and it won’t stick.

      Pro Tip: I like using Stencil Stuff. It’s a game-changer.

    3. Apply the Stencil: Place the stencil firmly on the skin, design-side down.

      Press gently and evenly to avoid air bubbles.

      Hold it in place for about 30-60 seconds.

    4. Carefully Remove the Stencil: Peel it off slowly and evenly.

      If the transfer is patchy or smudged, wipe it off immediately with alcohol and start over.

    5. Let It Dry: Give the stencil at least 10-15 minutes to fully dry before you start tattooing.

      This helps prevent it from wiping off during the tattooing process.

    Freehanding Your Sunflower Design

    Feeling artsy?

    Here’s how to freehand:

    1. Clean and Prep the Skin: Same as above.

      Cleanliness is next to godliness, especially with tattoos.

    2. Use Skin-Safe Markers: Only use markers specifically designed for skin.

      Sharpies are a big no-no.

      They can cause infections and are not meant for penetrating the skin.

    3. Draw Your Design: Take your time and sketch out your sunflower design lightly.

      You can always go over it again to darken the lines.

    4. Let It Dry: Allow the ink to dry completely before you start tattooing.

    Troubleshooting Common Issues

    • Stencil Not Sticking: Make sure your skin is clean and dry, and you’re using enough transfer cream.

    • Stencil Smudging: You’re probably using too much transfer cream. Less is more!

    • Design Fading During Tattooing: Apply a thin layer of petroleum jelly over the stencil to protect it.

    Final Thoughts

    Transferring your sunflower tattoo design is a crucial step.

    Take your time, be patient, and don’t be afraid to practice.

    The more you do it, the better you’ll get.

    Remember, a good transfer leads to a great tattoo.

    And that’s how you successfully transfer a sunflower tattoo design onto skin.

    FAQ: Sunflower Tattoo Transfer Edition

    • Can I use deodorant as a transfer agent?

      No! Deodorant contains chemicals that are not safe for tattooing. Stick to proper transfer creams or gels.

    • How long does the stencil last on the skin?

      A well-applied stencil can last for several hours, but it’s best to start tattooing as soon as possible after it dries.

    • What if I mess up the stencil?

      No worries! Just wipe it off with alcohol and try again. Practice makes perfect.

    • Can I use a regular printer to print stencils?

      You can use a regular inkjet or laser printer with transfer paper, but a thermal copier is ideal for creating long-lasting stencils.

    • Is freehanding safe?

      Yes, as long as you use skin-safe markers and follow proper hygiene practices.

  • Can I Print My Own Sunflower Tattoo Transfer?

    Can I Print My Own Sunflower Tattoo Transfer?

    Can I Print My Own Sunflower Tattoo Transfer?

    Okay, so you’re itching for some fresh ink, huh?

    And you’re thinking, "Can I print my own sunflower tattoo transfer?"

    I get it.

    Why pay someone else when you can DIY, right?

    Plus, sunflowers are awesome.

    But let’s dive into this because there are a few things you really need to know before you try printing your own tattoo transfer.

    The Burning Question: Can You Really Print Your Own Sunflower Tattoo Transfer?

    Short answer? Yes, you can.

    But… and this is a big BUT…

    Should you? That’s where it gets complicated.

    I’ve seen some DIY tattoo attempts go horribly wrong.

    Like, "emergency room visit" wrong.

    So, let’s break down the risks and rewards.

    What You’ll Need If You’re Determined to Print Your Own Sunflower Tattoo Transfer

    Alright, so you’re still on board.

    Cool.

    Here’s what you absolutely must have:

    • A Good Quality Printer: Seriously, don’t skimp. Inkjet is usually the way to go.
    • Tattoo Transfer Paper: This is specialized paper designed to transfer the image to your skin. Don’t use regular paper!
    • Sanitizing Supplies: Alcohol wipes, antibacterial soap – the works. Cleanliness is next to godliness, especially with tattoos.
    • A Sunflower Design: You knew that, but make sure it’s high-resolution and exactly what you want.
    • A Steady Hand (or a friend with one): Applying the transfer takes precision.
    • A Willing Canvas (aka, your skin): Choose your placement wisely!

    The Nitty-Gritty: How to Actually Print Your Sunflower Tattoo Transfer

    Okay, let’s get down to the process.

    1. Design is Key: Make sure your sunflower design is the exact size and style you want. Mirror it horizontally, otherwise, it’ll be backward on your skin.
    2. Load Your Transfer Paper: Follow the instructions on your specific transfer paper. Usually, you’ll need to load it face down.
    3. Print That Sunflower: Print your design. Double-check everything before you hit "print."
    4. Let it Dry: Let the ink dry completely to prevent smudging.
    5. Prepare Your Skin: Clean the area where you want the tattoo with alcohol wipes. Shave if necessary.
    6. Apply the Transfer: Carefully peel the backing off the transfer paper and apply the sticky side to your skin. Press firmly and evenly.
    7. Wet It Down: Use a damp cloth to wet the back of the transfer paper. Hold it for about 30-60 seconds.
    8. Peel and Pray: Gently peel the transfer paper away. Hopefully, your sunflower is now imprinted on your skin.
    9. Seal the Deal: Let it dry completely. Some people use a light dusting of translucent powder to help set it.

    The Risks of DIY Sunflower Tattoo Transfers: Let’s Be Real

    Look, I’m not trying to scare you, but this is important.

    • Infection: This is the biggest risk. If you’re not meticulous about cleanliness, you could end up with a nasty infection.
    • Allergic Reactions: The ink or transfer paper could cause an allergic reaction. Do a test patch first!
    • Poor Quality Results: Let’s face it, a DIY tattoo transfer isn’t going to look as good as a professional tattoo.
    • Permanent Damage: If you’re not careful, you could damage your skin.

    I remember my friend, Sarah, tried a DIY tattoo kit once.

    Ended up with a blurry, faded mess and a mild skin irritation.

    Not worth it, in my opinion.

    Alternatives to Printing Your Own Sunflower Tattoo Transfer

    Maybe you’re thinking, "Okay, Dakota, you’ve convinced me. DIY might not be the best idea."

    Here are some alternatives:

    • Temporary Tattoos: These are a fun, safe way to rock a sunflower design without the commitment.
    • Henna Tattoos: Henna is a natural dye that creates temporary tattoos.
    • Professional Tattoos: If you’re serious about getting a sunflower tattoo, go to a reputable tattoo artist. They know what they’re doing.

    FAQ: Your Burning Sunflower Tattoo Transfer Questions Answered

    • Can I use any printer? Ideally, use an inkjet printer. Laser printers might not work as well.
    • What kind of ink should I use? Use the ink recommended by the transfer paper manufacturer.
    • How long will a DIY tattoo transfer last? Usually, a few days to a week, depending on how well you take care of it.
    • Is it safe to use regular printer paper? NO! Never use regular printer paper for tattoo transfers.
    • Where can I buy tattoo transfer paper? Online retailers like Amazon, or art supply stores.

    Final Thoughts: Making the Right Choice About Your Sunflower Tattoo

    Ultimately, the decision of whether or not to print your own sunflower tattoo transfer is up to you.

    Weigh the risks and rewards carefully.

    If you’re unsure, err on the side of caution and go with a temporary tattoo or a professional artist.

    Your skin will thank you.

    And remember, the goal is to have a beautiful sunflower design that you love, without risking your health.

    So, choose wisely when deciding if you can print your own sunflower tattoo transfer.

  • How Do I Make A Diy Sunflower Tattoo Using Transfer Paper?

    How Do I Make A Diy Sunflower Tattoo Using Transfer Paper?

    How Do I Make A Diy Sunflower Tattoo Using Transfer Paper?

    Okay, so you wanna rock a sunflower tattoo, huh?

    But you’re thinking, “Do I really wanna commit?

    And what if I hate it?”

    I get it.

    That’s where a DIY sunflower tattoo using transfer paper comes in clutch.

    It’s temporary, fun, and totally customizable.

    Let’s dive into how you can make your own temporary sunflower tattoo.

    Getting Started: Your DIY Sunflower Tattoo Adventure

    First things first: what do you need?

    This isn’t rocket science, but having the right stuff makes a world of difference.

    • Your Sunflower Design: Find a sunflower image you love.
      • Think about size and detail.
      • Simple designs transfer better, especially for beginners.
    • Temporary Tattoo Transfer Paper: This is the key!
      • You can find it online or at most craft stores.
      • Make sure it’s the kind that works with your printer.
    • A Printer: Inkjet or laser, depending on your transfer paper.
      • Read the instructions on your transfer paper pack.
    • Scissors: For cutting out your design.
    • Damp Cloth or Sponge: To apply the tattoo.
    • A Clean, Shaved Area of Skin: Your canvas!

    Designing Your Sunflower Masterpiece

    Okay, you’ve got your supplies.

    Now, let’s talk design.

    I remember when I first tried this, I went way too intricate.

    Big mistake!

    The fine lines didn’t transfer well.

    Here’s the deal:

    • Keep it simple. Bold lines and shapes are your friends.
    • Size matters. Don’t go too big on your first try.
    • Mirror, mirror. You’ll need to flip your design horizontally before printing. Most image editing programs have a "mirror" or "flip horizontal" option. This ensures your sunflower faces the right way on your skin.

    Printing and Preparing Your Transfer

    Now for the techy part (but it’s not that techy, I promise).

    1. Load the Transfer Paper: Follow the instructions on your transfer paper packaging to load it into your printer correctly. This is important.
    2. Print Your Design: Double-check that you’ve mirrored the image! Print it out.
    3. Let it Dry: Let the ink dry completely to prevent smudging. Usually, a few minutes is enough.
    4. Cut it Out: Carefully cut around your sunflower design, leaving a small border.

    Applying Your DIY Sunflower Tattoo

    This is where the magic happens.

    1. Clean Your Skin: Make sure the area where you’re applying the tattoo is clean, dry, and free of oils or lotions. Alcohol wipes work great.
    2. Peel Off the Protective Sheet: Carefully peel off the clear protective sheet from the printed side of the transfer paper.
    3. Position the Tattoo: Place the printed side of the transfer paper onto your skin where you want the tattoo to be.
    4. Wet It Down: Press a damp cloth or sponge firmly onto the back of the transfer paper. Hold it there for about 30-60 seconds.
    5. Peel it Off: Gently peel the paper backing away. If the image isn’t transferring properly, wet it again and hold for a few more seconds.
    6. Let it Dry: Let the tattoo air dry completely. Avoid touching or rubbing it for at least 10-15 minutes.

    Making Your Temporary Tattoo Last (A Little Longer)

    Okay, it’s not permanent, but you can extend its life.

    • Avoid friction: Clothes rubbing against the tattoo will make it fade faster.
    • Skip the soap: Try not to scrub the area with soap when you shower.
    • Moisturize carefully: Avoid applying oily lotions directly on the tattoo.

    Troubleshooting Common Issues

    • Tattoo didn’t transfer properly?
      • Make sure the paper was wet enough.
      • Check that your printer settings are correct.
    • Tattoo faded too quickly?
      • You might have oily skin. Try using a mattifying primer before applying the tattoo.
      • Avoid excessive sweating or swimming.
    • Allergic reaction?
      • Stop using the transfer paper immediately.
      • Some people are sensitive to the adhesives or inks used.

    FAQ: Your Sunflower Tattoo Questions Answered

    • How long will my DIY sunflower tattoo last?
      • Usually 1-5 days, depending on your skin and how well you care for it.
    • Can I use any kind of paper?
      • Nope. You need special temporary tattoo transfer paper. Regular paper won’t work.
    • Is it safe?
      • Generally, yes, but always test a small area of skin first to check for any allergic reactions.
    • How do I remove it?
      • Rubbing alcohol or baby oil usually does the trick.

    So, there you have it!

    Creating a DIY sunflower tattoo using transfer paper is a fun, easy way to experiment with body art without the commitment.

    Have fun creating your own temporary sunflower tattoo!